Creating Your First Product Photoshoot with prodlens.ai

Creating professional product photography doesn't require expensive equipment, a photography studio, or years of experience anymore. With AI-powered tools like prodlens.ai, you can transform simple product photos into studio-quality images in minutes. This complete beginner's guide walks you through your first product photoshoot step-by-step.
New to prodlens.ai? This tutorial assumes no prior experience. Follow along and you'll have professional product photos in under 10 minutes!
What You'll Need to Get Started
Before diving into your first photoshoot, gather these essentials:
Required:
- A clear photo of your product (can be taken with a smartphone)
- A prodlens.ai account (free to start)
- At least 1 credit (each image costs 1 credit)
Optional but recommended:
- Additional product images ready (create separate generations for each)
- Good natural lighting for source photos
- Clear vision of your desired aesthetic or style
prodlens.ai accepts images up to 10MB in JPEG, PNG, or WebP formats. Most smartphone photos work perfectly—no professional camera needed!
Understanding the prodlens.ai Generation Process
prodlens.ai uses AI to transform your basic product photos into professional marketing images. Here's how it works:
- Upload your product image
- Choose a style preset (Luxury Editorial, Modern Minimal, etc.)
- Select your preferences (aspect ratio, number of variations)
- Generate in 20-30 seconds
- Download your professional results
Each generation costs 1 credit per image. If you generate 3 variations, you'll use 3 credits total.
Step 1: Preparing Your Product Image
The quality of your source image directly impacts your results. Follow these best practices:
Photo Quality Guidelines
Lighting:
- Use natural daylight when possible
- Avoid harsh shadows or dark backgrounds
- Ensure your product is well-lit and details are visible
Background:
- White or neutral backgrounds work best
- The AI will replace the background anyway
- Focus on product clarity, not background aesthetics
Framing:
- Center your product in the frame
- Leave some space around edges (avoid cutting off parts)
- Capture the full product unless showing a detail shot
Resolution:
- Minimum 800×800 pixels (for zoom functionality)
- Recommended: 1024×1024 pixels or higher
- Maximum file size: 10MB
Avoid blurry, pixelated, or poorly lit source images. While AI is powerful, it can't create detail that doesn't exist in the original photo.
Prepare multiple product photos in advance! Each generation uses one image, so you can create separate generations for different angles to build a complete product gallery.
Step 2: Starting a New Generation
Once your product image is ready, let's create your first photoshoot:
-
Navigate to Generations
- Click "My Creations" in the sidebar
- Click the "New Creation" button
- The generation form opens in a modal
-
Upload Your Product Image
- Click "Upload Image" or drag & drop your file
- Alternatively, paste an image URL if hosted online
- Wait for the upload to complete (usually instant)
You can also upload images via URL. This is useful if your product photos are already hosted on Shopify, Amazon, or another platform.
Step 3: Choosing the Right Style Preset
Presets are pre-configured style templates that define how your product will be presented. Each preset creates a different mood and aesthetic.
Popular Presets and When to Use Them
Luxury Editorial:
- High-end dramatic style with sophisticated lighting
- Perfect for: jewelry, watches, premium brands, luxury goods
- Creates: Moody, elegant, aspirational images
Modern Minimal:
- Clean, simple aesthetic with soft shadows
- Perfect for: tech products, cosmetics, home goods
- Creates: Professional, versatile, contemporary images
Natural Lifestyle:
- Warm, organic feel with natural textures
- Perfect for: food products, wellness items, eco-friendly brands
- Creates: Approachable, authentic, relatable images
Bold Commercial:
- Vibrant colors with high contrast
- Perfect for: sports gear, toys, electronics
- Creates: Eye-catching, energetic, attention-grabbing images
Not sure which preset to choose? Browse the Presets gallery first! Each preset shows example images so you can see the style before generating.
How to Select a Preset
- Click the "Preset" dropdown in the generation form
- Browse available presets with thumbnail previews
- Read the description to understand the style
- Select the preset that matches your brand aesthetic
Presets save you time by providing professional photography styles without manual configuration. No photography knowledge required!
Step 4: Configuring Generation Settings
Now let's fine-tune your generation with these settings:
Aspect Ratio Selection
Choose the dimensions that match your intended use:
| Aspect Ratio | Best For | Example Use Cases |
|---|---|---|
| 1:1 (Square) | Shopify, Instagram | Product listings, social posts |
| 4:3 (Standard) | Website banners | Homepage headers, feature sections |
| 16:9 (Widescreen) | Hero images | Landing pages, YouTube thumbnails |
| 3:4 (Portrait) | Mobile displays | Instagram Stories, Pinterest pins |
| 21:9 (Ultra Wide) | Desktop headers | Website hero sections, banners |
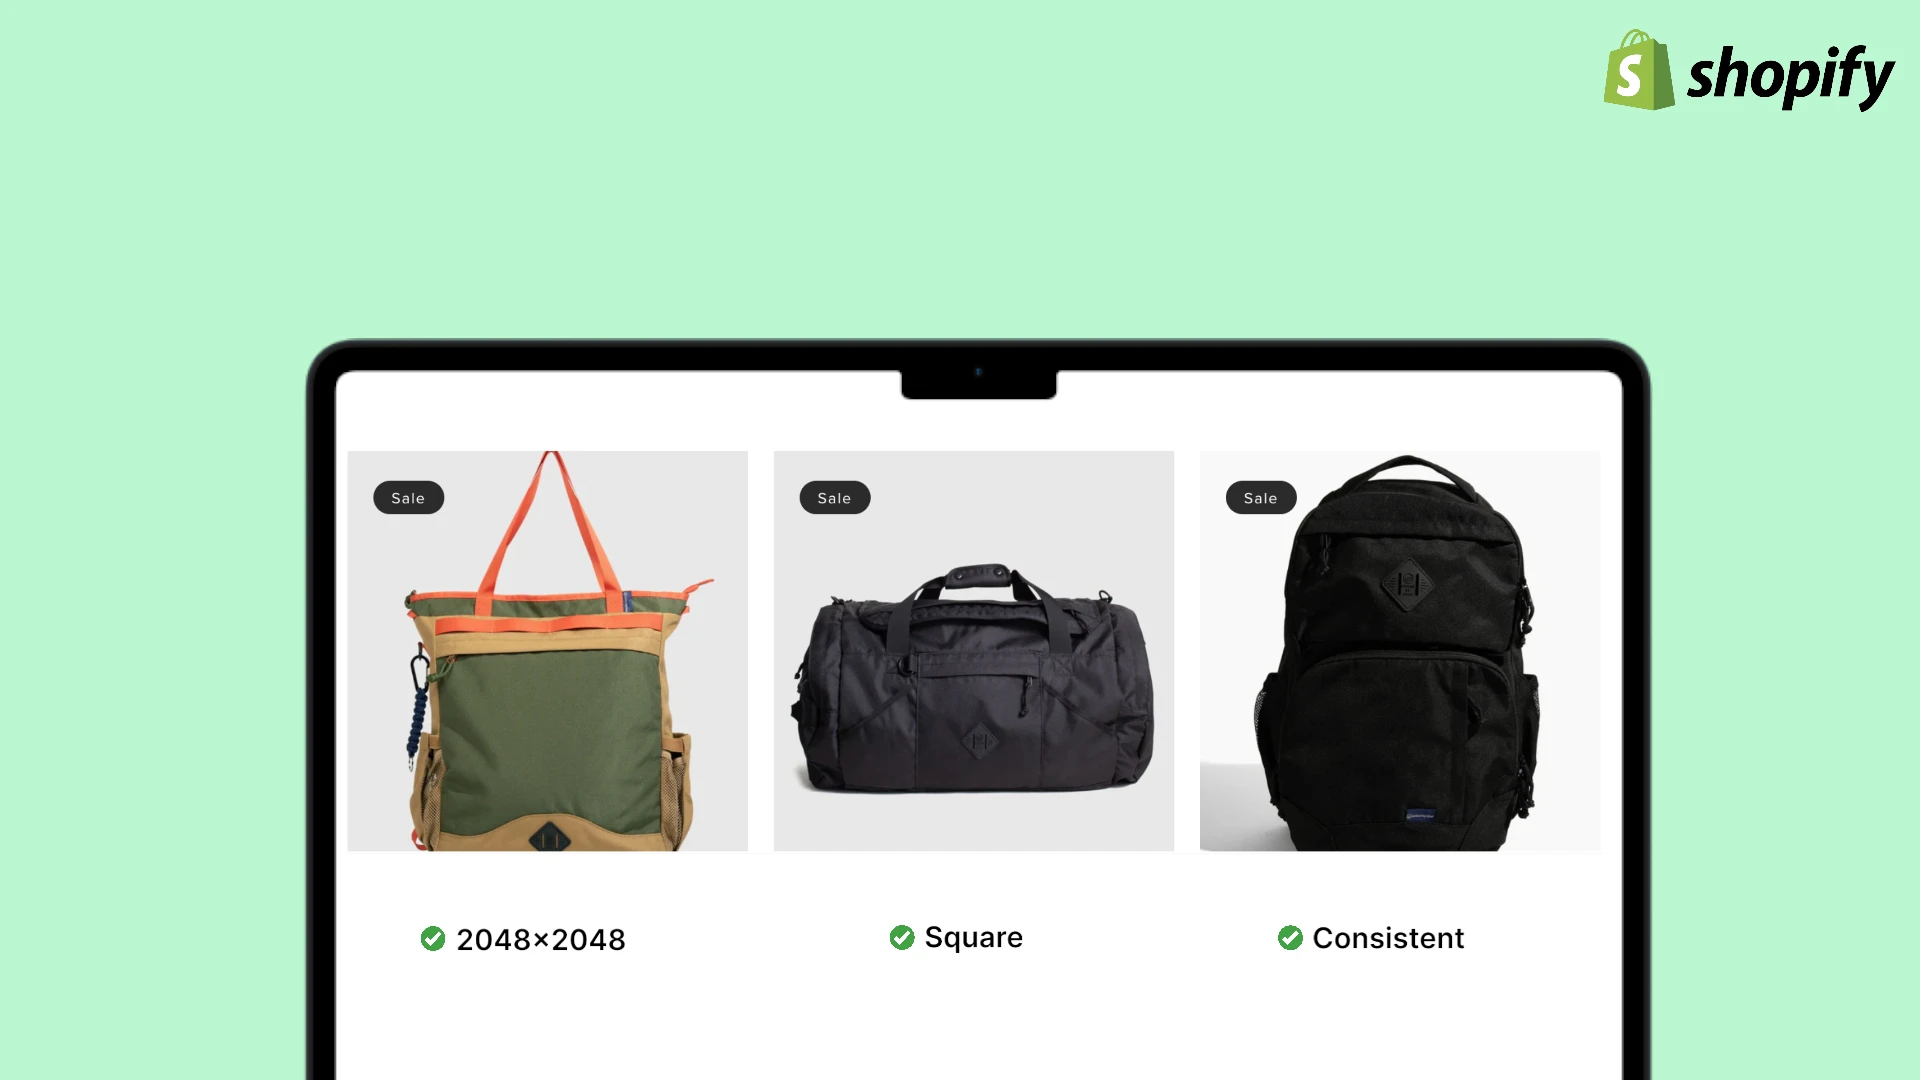
For Shopify stores, always use 1:1 (Square) to ensure your images work perfectly with the product zoom feature and mobile displays.
Generating multiple images lets you compare variations and choose the best one. Each variation may have slightly different lighting, angles, or compositions.
Review Your Settings
Before generating, double-check:
- Source image is clear and well-lit
- Preset matches your brand style
- Aspect ratio fits your intended platform
- Number of images aligns with your budget (1 credit each)
- You have enough credits in your account
Step 5: Generating Your Product Photos
Once everything is configured, click the "Generate" button. The AI will transform your product photo into professional marketing images.
What to Expect
- Processing time: Typically 20-30 seconds
- Status updates: Real-time progress indicator shows generation status
- Completion: You're automatically redirected to view your results
- Ready to download: All images are immediately available
The entire process from upload to download takes under 60 seconds. No waiting, no complex settings—just professional product photos in moments.
Step 6: Viewing and Comparing Results
Once generation completes, you'll see the results in an interactive viewer:
Navigating Your Generated Images
Image Carousel:
- Use arrow buttons (left/right) to browse variations
- Click dot indicators at the bottom to jump to specific images
- Each image shows as full-size with your chosen aspect ratio
Comparing Variations:
- Look for differences in lighting, shadows, and composition
- Consider which variation best showcases your product
- Check if text elements (logos, labels) are clearly visible
Generation Details Panel:
- View creation timestamp and status
- See which preset and settings were used
- Check generation cost (credits used)
- Review aspect ratio and image count
Can't decide between variations? Download all of them! You can A/B test different versions on your product page to see which converts better.
Step 7: Downloading Your Product Photos
Ready to use your professional images? Here's how to download them:
Download Options
-
Click the Download button on any image
-
Choose your format:
- PNG: Lossless quality, larger file size (best for editing)
- JPG: Good quality, smaller file size (best for web)
- WebP: Excellent quality, smallest file size (modern format)
-
Download starts immediately
- File naming:
prodlens-gen-1.{format} - Saves to your default downloads folder
- File naming:
WebP format offers 25-35% smaller file sizes than JPG with the same visual quality—perfect for fast-loading websites!
Watermarks (Free vs Subscribed Users)
- Free users: Images include a subtle prodlens.ai watermark (bottom-right, 25% opacity)
- Subscribed users: No watermarks—download clean, professional images
The watermark is small and semi-transparent, designed not to distract from your product.
Step 8: Advanced Actions - Upscale and Edit
After downloading, you have two powerful options to enhance your images further:
Upscaling Images for Higher Resolution
Need larger images for print or high-resolution displays?
How Upscaling Works:
- Click the "Upscale" button on any image
- Doubles resolution (e.g., 1024×1024 → 2048×2048)
- Maximum output: 8192×8192 pixels
Upscaling Cost Examples:
- 512×512 → 1024×1024 = 0.25 credits
- 1024×1024 → 2048×2048 = 0.5 credits
- 2048×2048 → 4096×4096 = 1 credit
Generate at 1024×1024 first (saves credits), then upscale only the variation you want to use at higher resolution.
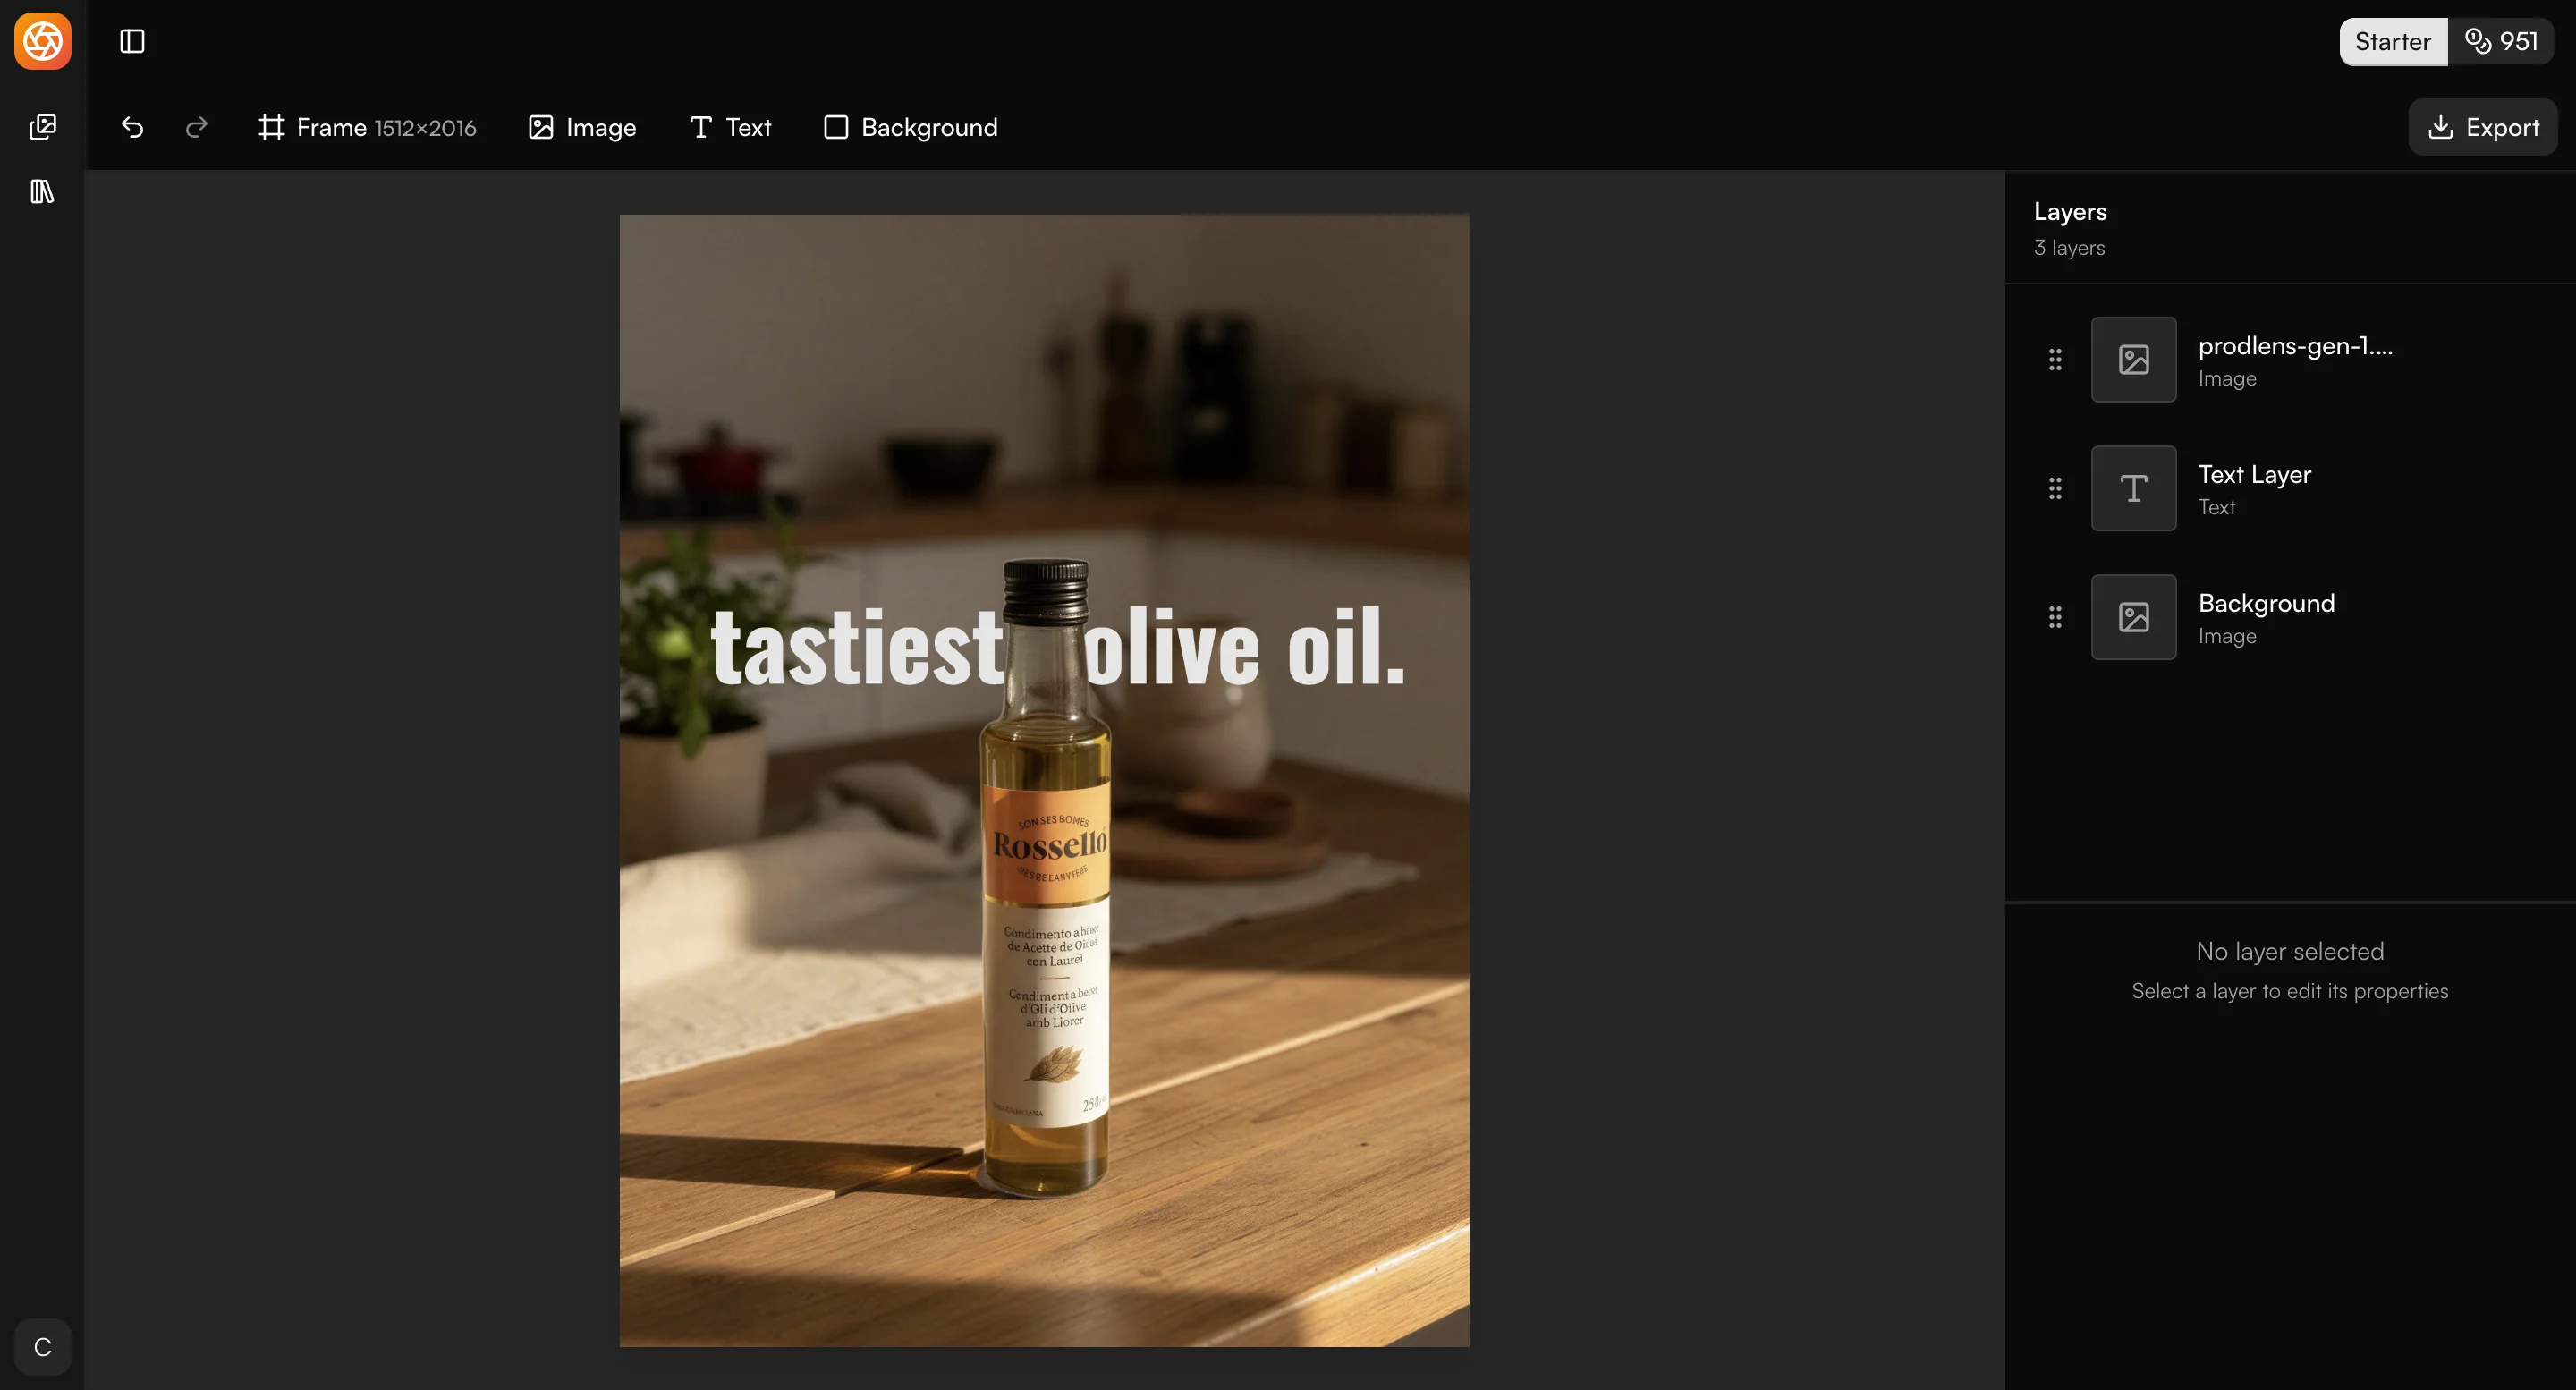
Editing in Canvas Editor
Want to add custom elements or make adjustments?
Canvas Editor Features:
- Click "Edit" to open the image in Canvas Editor
- Remove backgrounds with precision tools
- Add text overlays (product names, prices, CTAs)
- Add brand logos or watermarks
- Layer multiple elements
The Canvas Editor gives you full creative control while maintaining AI-generated quality.
Best Practices for Professional Results
Follow these tips to get the most from your AI product photoshoots:
Source Image Quality
| DO | DON'T |
|---|---|
| Use clear, well-lit photos (natural daylight preferred) | Use blurry, pixelated, or dark images |
| Center product in frame with space around edges | Crop too tightly (leave breathing room) |
| Capture at least 1024×1024 resolution | Submit images under 800×800 pixels |
| Prepare different product angles (create separate generations for each) | Include multiple products in one frame |
| Ensure product details and text are visible | Use heavily edited or filtered source photos |
Preset Selection Strategy
Match Your Brand:
- Luxury brands → Luxury Editorial preset
- Tech products → Modern Minimal preset
- Organic/natural products → Natural Lifestyle preset
- Youth/sports brands → Bold Commercial preset
Consider Your Audience:
- B2B customers prefer clean, professional aesthetics
- B2C audiences respond to emotional, lifestyle imagery
- Premium markets expect sophisticated, elegant styling
Aspect Ratio Guide by Platform
| Platform | Recommended Ratio | Why |
|---|---|---|
| Shopify | 1:1 (Square) | Enables zoom, mobile-friendly |
| Amazon | 1:1 (Square) | Required for main images |
| Instagram Feed | 1:1 (Square) | Native format, full display |
| Instagram Stories | 3:4 (Portrait) | Full-screen mobile |
| Facebook Ads | 1:1 or 4:5 | Best engagement rates |
| Website Hero | 16:9 (Widescreen) | Desktop banner standard |
| 2:3 (Portrait) | Native pin format |
Generate multiple aspect ratios of the same product using the same preset—this gives you platform-specific versions with consistent branding!
Common Use Cases and Examples
See how different businesses use prodlens.ai for product photography:
E-commerce Product Listings (Shopify/Amazon)
Goal: Clear, professional product presentation Preset: Modern Minimal or Luxury Editorial Aspect Ratio: 1:1 (Square) Number of Images: 3-4 (provide variety for customers)
Create separate generations for different angles (front, side, detail shots) to build a complete product gallery.
Social Media Content (Instagram/Facebook)
Goal: Eye-catching, scroll-stopping imagery Preset: Bold Commercial or Natural Lifestyle Aspect Ratio: 1:1 (Feed posts), 3:4 (Stories) Number of Images: 2-3 per post for carousel variety
Create cohesive brand aesthetics by using the same preset across all products.
Website Hero Images
Goal: Dramatic, attention-grabbing headers Preset: Luxury Editorial or Bold Commercial Aspect Ratio: 16:9 (Widescreen) or 21:9 (Ultra Wide) Number of Images: 1 hero shot
Focus on your hero product or best-seller for maximum impact.
Email Marketing Visuals
Goal: Clean, clickable product showcases Preset: Modern Minimal Aspect Ratio: 4:3 (Standard) for desktop email clients Number of Images: 1-2 featured products per email
Keep file sizes optimized (use JPG or WebP) for fast email loading.
Build a library of product images across different presets and aspect ratios. This gives you ready-to-use assets for any marketing channel without regenerating!
Managing Your Generations
Keep your product library organized with these tips:
Viewing Past Generations
- Access "My Creations" from the sidebar
- Infinite scroll loads all past generations
- Each generation shows thumbnail preview and details
Making Images Public
Want to showcase your work in the public gallery?
- Open any completed generation
- Click the "Private" toggle to switch to "Public"
- Your image may appear in the prodlens.ai showcase
- Public images help promote both you and the platform
Public showcase images require your consent. Your images remain private by default—you control visibility.
Next Steps: Building Your Brand Aesthetic
Now that you've completed your first photoshoot, here's how to scale up:
Consistency is Key
Build a Brand Style:
- Choose 1-2 presets that match your brand identity
- Use consistently across all products
- Customers recognize cohesive aesthetics
- Builds professional brand perception
- Update old listings with fresh AI-generated images
- A/B test different styles to find what converts best
Subscription Benefits
Consider upgrading for these advantages:
Included in Paid Plans:
- No watermarks on any downloads
- Higher credit allowances
- Priority generation queue
- Access to premium presets
- Advanced editing features
ROI Calculation:
- Professional photographer: $500-2000 per product shoot
- prodlens.ai: ~$0.10-0.50 per image (depending on plan)
- Time saved: Hours → Minutes
- Flexibility: Regenerate unlimited times until perfect
Conclusion: Professional Product Photography Made Simple
You've just completed your first AI-powered product photoshoot! Here's what you've learned:
- How to prepare and upload product images
- Choosing the right preset for your brand
- Configuring aspect ratios and generation settings
- Navigating results and downloading in multiple formats
- Advanced actions like upscaling and editing
- Best practices for professional results
Key Takeaways:
- Each image costs 1 credit (affordable for small businesses)
- Generation takes 20-30 seconds (incredibly fast)
- No photography skills required (AI handles everything)
- Multiple formats available (PNG/JPG/WebP)
- Scalable for businesses of any size
Whether you're a Shopify seller with 10 products or an enterprise with 10,000 SKUs, prodlens.ai makes professional product photography accessible, affordable, and fast.
The best way to learn is by doing! Generate 5-10 different product images using various presets to discover which styles work best for your brand.
Frequently Asked Questions
Ready to transform your product photography? Start your first photoshoot now!
Related Articles